Well Fibre

  • Home
  • Workbook
  • Services
  • Shop
  • Blog
  • About
  • Contact

Easy DIY Elastic Skirt (styled 4 ways!)

October 05, 2021 by Star White in Clothing Makes

What’s more satisfying than a quick DIY resulting in something wearable and cute?! Not much if you ask me…

When I stumbled upon this fabric on sale at Joann’s the other day, I knew it needed to become a gathered skirt to adorn this big bump of mine as well as my post-partum body this fall. I’m very into garments that can accommodate body fluctuation, which there has been much of for me this year. 🙃

To create a similar skirt you will need:

  • Wide elastic

  • Fabric with a good drape

  • Thread

  • A sewing machine

Here is how I put this skirt together!

  1. Take your elastic and wrap it around your waist. Tighten it a little more than what is comfortable as it will ‘grow’ a bit when adding the fabric later. Then cut with about an inch added in length for seam allowance.

  2. Sew the elastic together using a French seam style (see this illustration for example).

  3. Hold up your fabric in the mirror and decide on the length of your skirt. I wanted a midi-style so I cut accordingly. I wanted to showcase this fabric’s raw funky edge so I didn’t have to accommodate for a hem, but do consider that if your skirt will need to be hemmed.

  4. Measure the circumference of your elastic to determine the width to cut your fabric. This doesn’t have to be precise, but I ended up with about a 1:1.75 ratio. Meaning the width of the fabric is 1.75 times the total circumference of the elastic. This is how you achieve a gathered look!

  5. Using a straight stitch, sew your skirt’s back seam by bringing wrong sides together. Finish raw edges of this seam and the top raw edge in your desired manner (I used my serger).

  6. Now for the gathering! On your machine’s longest stitch setting, sew 2 rows of stitches at the top of your skirt at 3/8in & 5/8in (elastic is set aside for now). I like to use a contrasting thread as it helps to see clearly what you’re doing and it will be discarded later. Make sure not to backstitch bc you need to pull the threads.

  7. Grab your elastic and place pins at the 1/2, 1/4, and 1/8 marks. I do this by simply folding it in half, putting a pin in, folding that part in half, and repeating.
    Do this same step for the top of your skirt.
    You should have the same number of pins in your elastic and your skirt top.

  8. With right sided together, match pins from skirt and elastic. All of this work helps to distribute your gathers nice and evenly!
    Gently pull on the 2 bobbin threads on the skirt to start to gather fabric. Take your time here to maneuver the fabric and place extra pins to hold it in place.
    When gathers are set, I like to knot the bobbin thread to hold it all in place.

  9. Now, with your machine set to a zigzag stitch, sew the gathered fabric to the elastic using desired thread color. The zigzag stitch allows the elastic to be able to stretch once you’re all done.
    This is the part where the waist ‘grows’ a little and why you want it go a little tighter on the elastic as mentioned before.

  10. Hem the bottom of your skirt if needed and enjoy!!

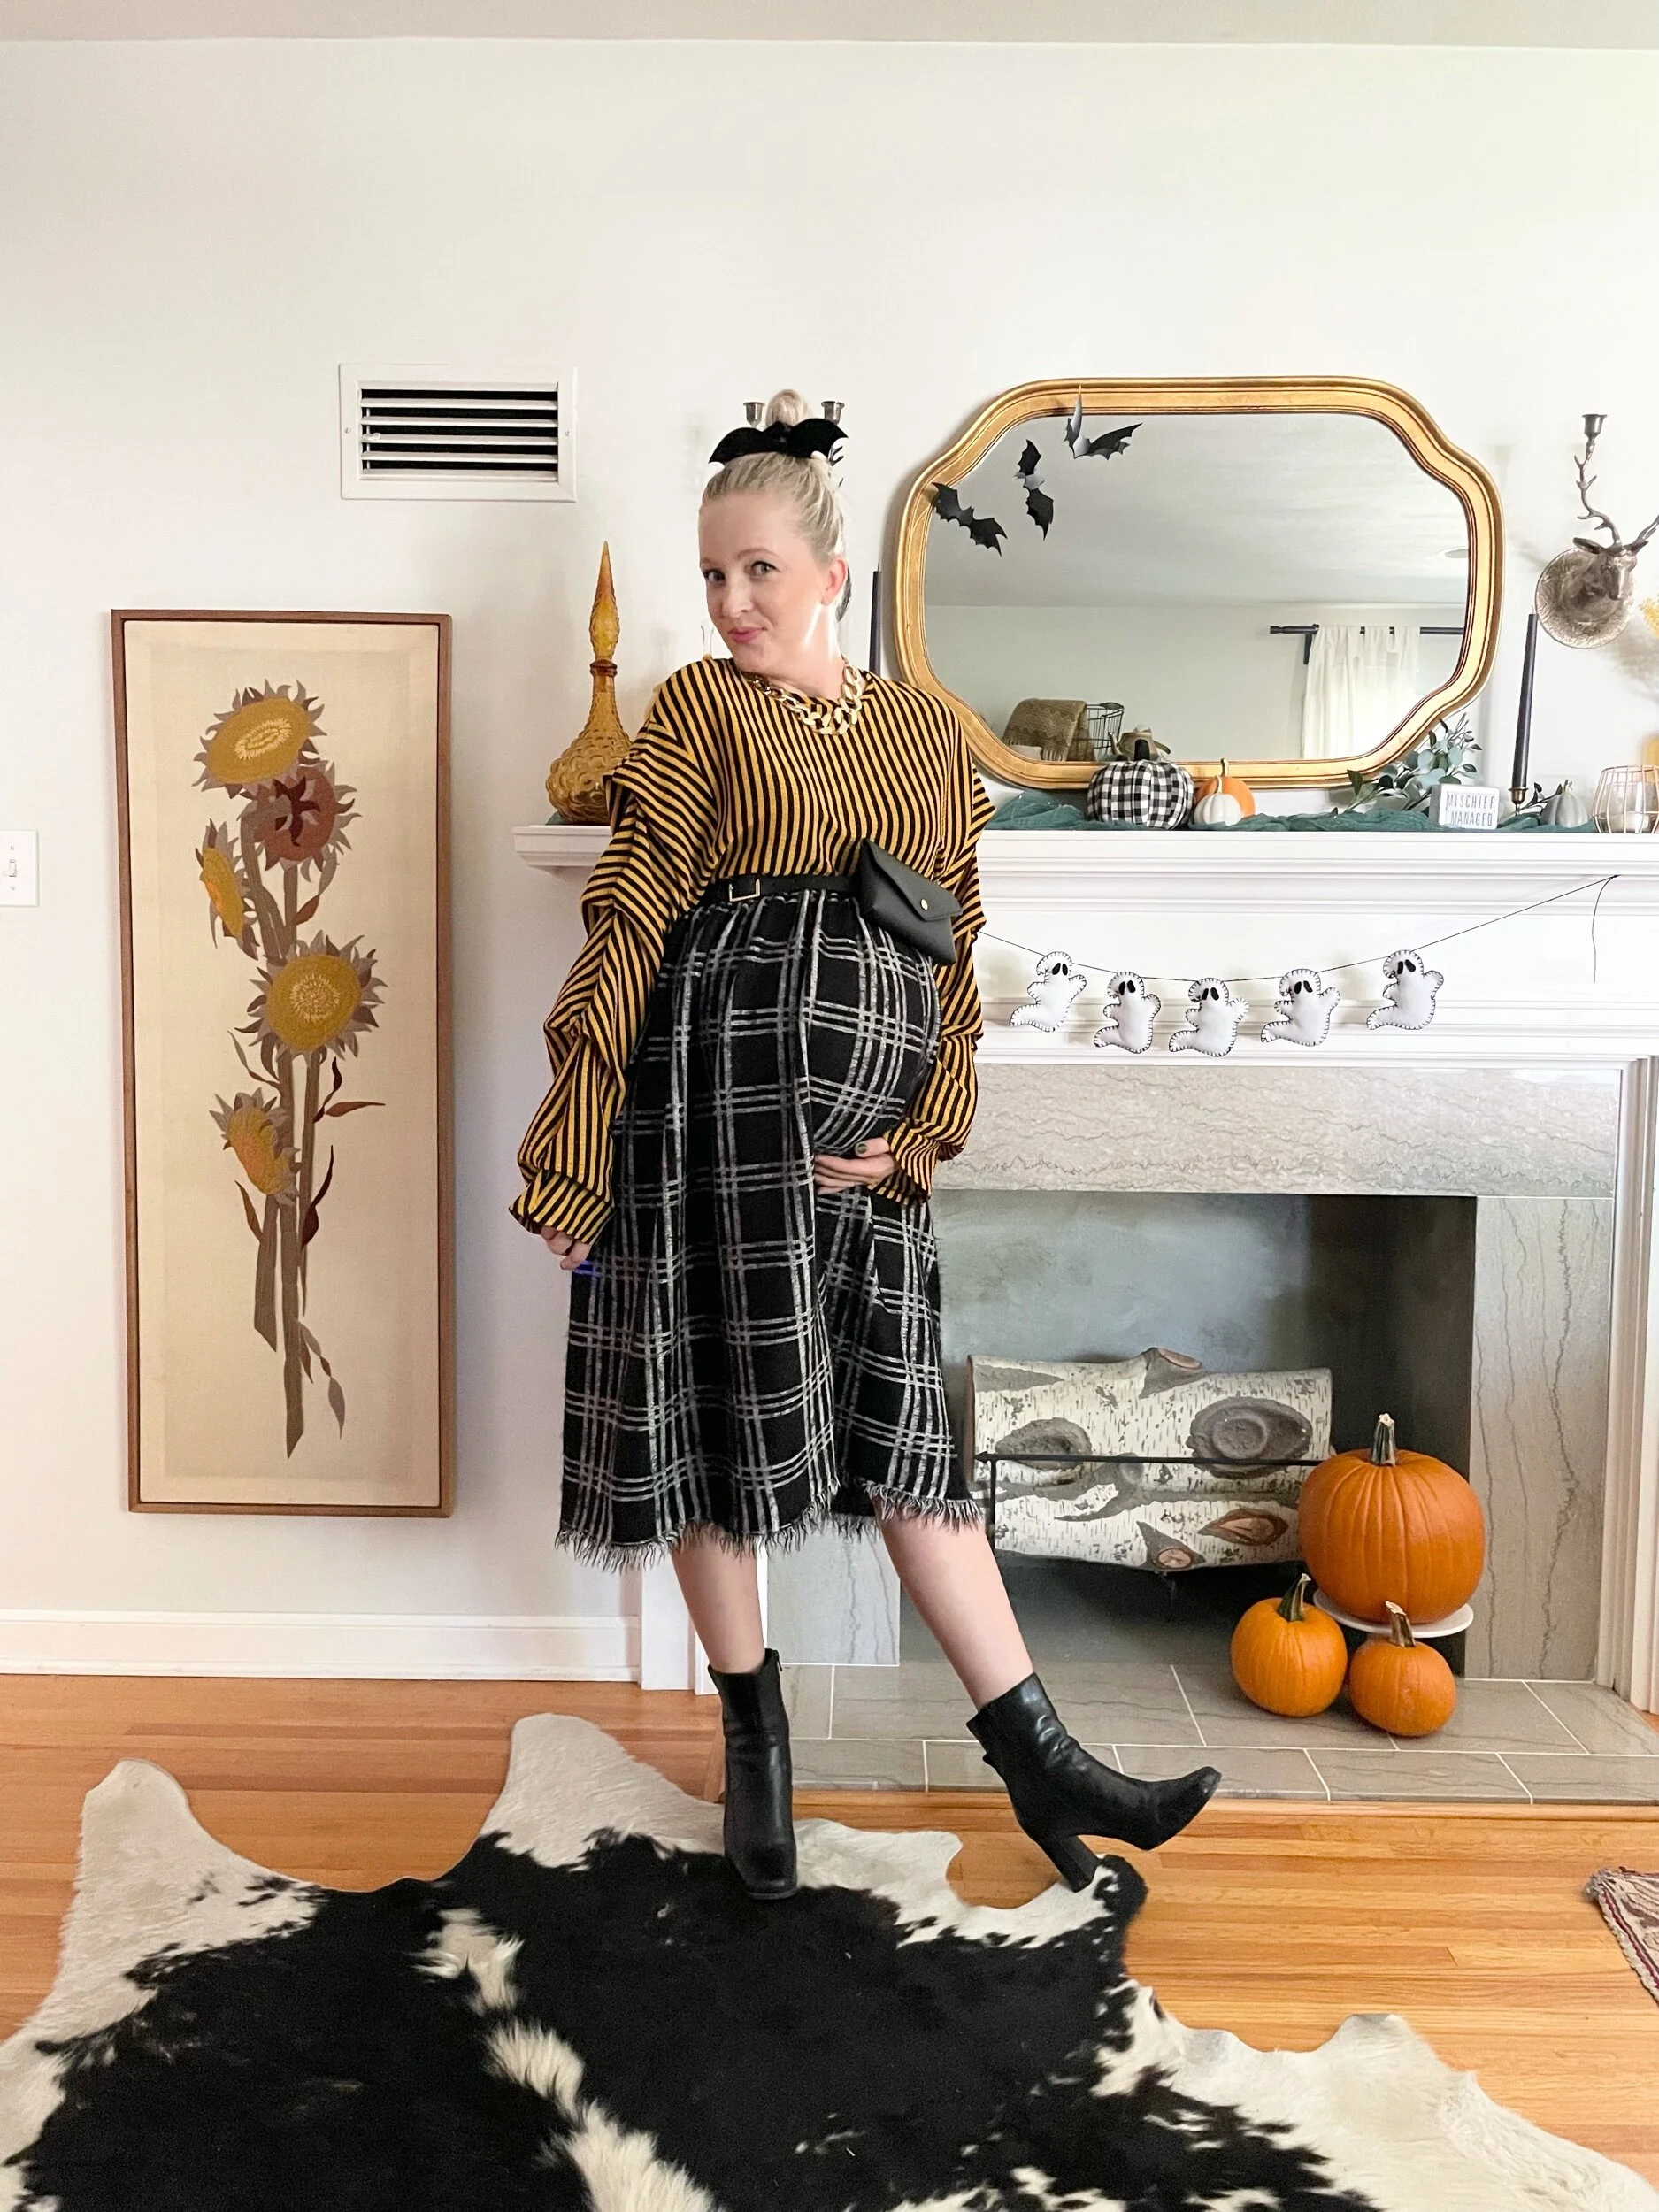
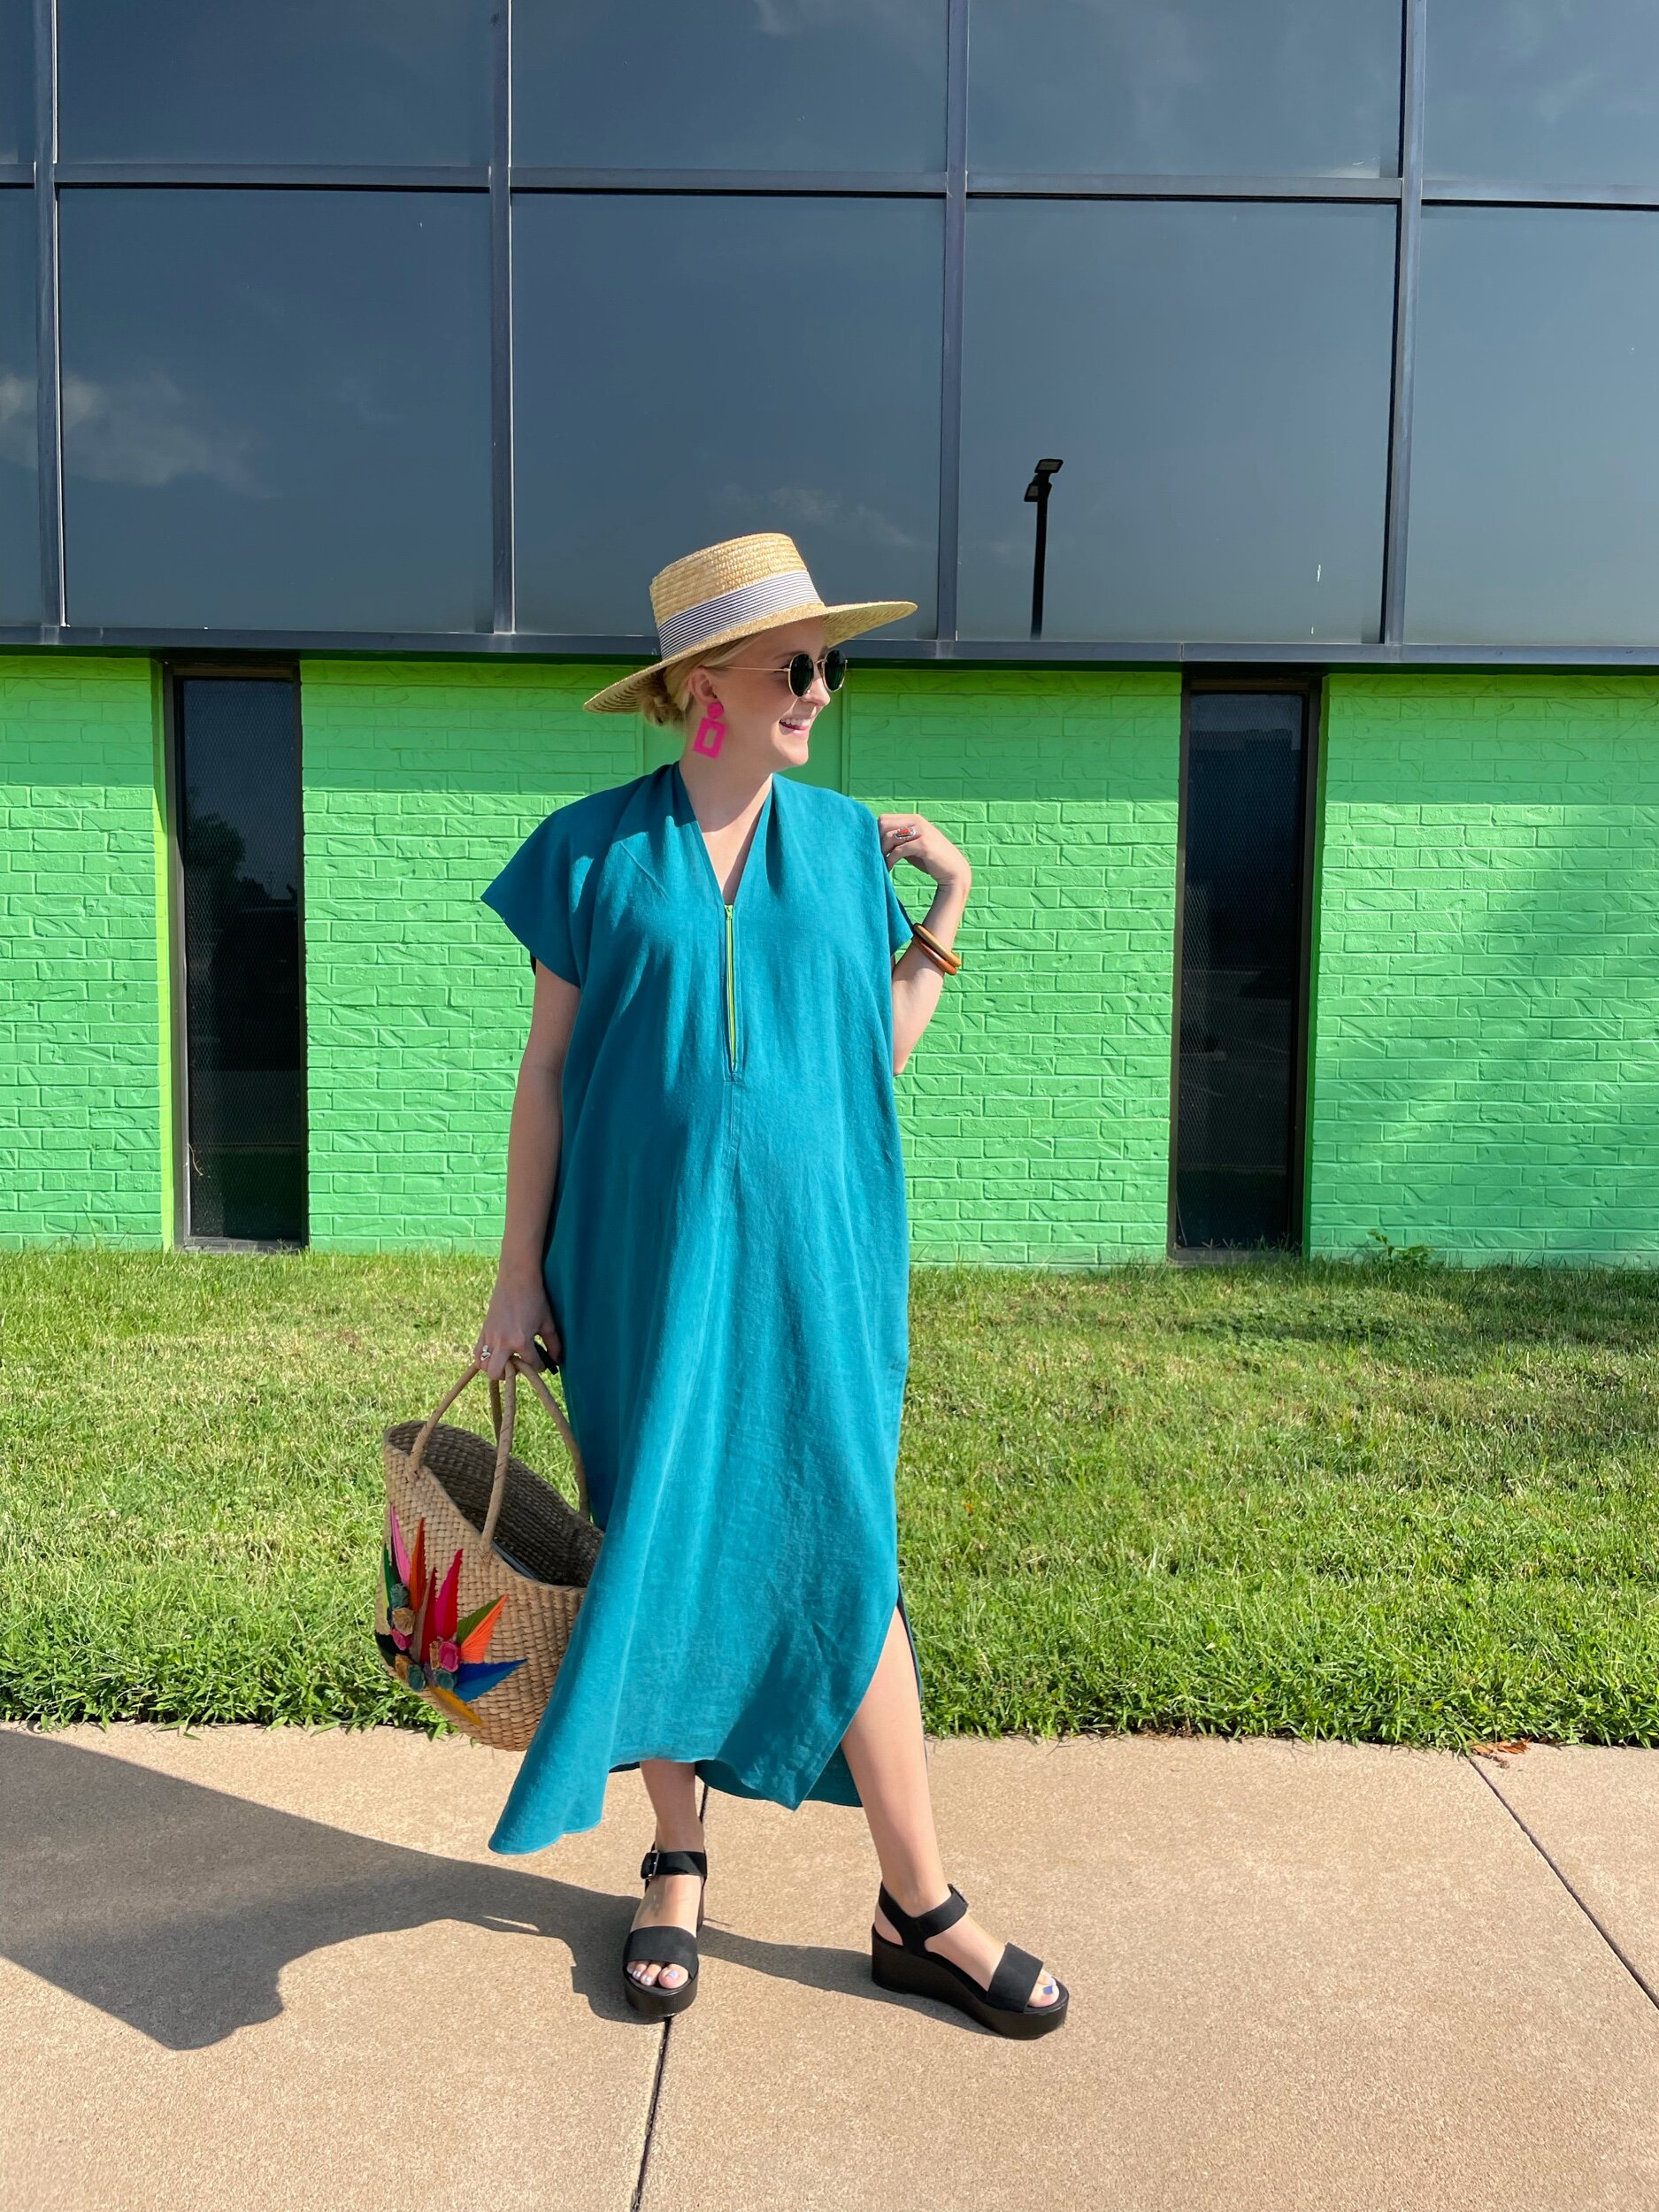
I had a lot of fun styling this skirt for the fall, especially the month of October! I mean, what else does one do at 38 weeks pregnant while they await their baby’s arrival? 😂

Go to my Instagram and tell me which look is your fav!! Happy sewing, friends!

October 05, 2021 /Star White
diy skirt, diy elastic skirt, simple sewing, beginner sewing, wellfibre, fall style, maternity style, fall maternity style
Clothing Makes
Comment

Nursing Friendly Envelope Dress

September 22, 2021 by Star White in Clothing Makes

Hi from me and my 36 week bump!

As I approach the delivery of my son (Hugo!), I’m eager to find garments that are both nursing friendly AND my style. This is turning up to be hard to find! So…to Instagram hashtags and my sewing machine I go!

The Cris Woods Envelope Dress has been in the queue for some time, but it wasn’t until I saw Tori from The Sewing Things Blog create a nursing friendly version that I decided to pull the trigger!

IMG_2338.jpeg

Tori inserted an invisible zipper into the neckline front seam, a super simple and incredibly functional hack. Absolutely brilliant!

I shamelessly used her hack and dug through my zipper stash. I didn’t have an invisible zipper that fit the bill, but I did have this apple-green vintage one that I was instantly drawn to. I love the contrast of the teal rayon linen (found at Joann’s on sale last year) and the green.

I simply followed the pattern instructions as well as the zipper instructions found on the packaging to place the zipper in the front seam at the top.

The only other modification I made was adding vents to the bottom side seams to make walking a little less restricted. I didn’t even have to hem the dress bc the selvedge edge was just too cute to hide!

And that’s it! This is a GREAT beginner friendly pattern that accommodates body size change (can I get an amen?!) as well as changing seasons. I’m excited to style it for fall!

I may make a belt to accompany the dress once my body settles into its new norm in a few months. We will see how sleep deprived I am! 🙃

Thank you to Cris and Tori for inspiring me!!

September 22, 2021 /Star White
envelopedress, criswoodsenvelopedress, beginnersewing, nursingfriendly, nursingfriendlydress, linenrayon, simplediydress, zipfrontdress, criswoods
Clothing Makes
2 Comments

Vintage Quilt Jacket

September 20, 2021 by Star White in Clothing Makes

Well hello friends! It’s been quite sometime since I posted on this space, but I’m back with a really fun make I couldn’t resist sharing!

Patchwork and quilted clothing seem to have become increasingly popular these days and I have caught the fever! After seeing so many beautiful cozy quilt jackets, I began searching for the ‘perfect’ quilt to use for my project. I have a lot of thoughts/feelings about this whole process so I will break down each step of the quilty-journey for you! :)

How I chose my quilt

First things first, I set an alert on Facebook Marketplace for the terms ‘quilt’ and ‘vintage quilt’. This way I received notifications for any local people were selling such items.

While I don’t personally quilt, as a seamstress I understand the amount of time and effort it takes to create a masterpiece like a quilt. It’s a commitment and a piece of art, truly! So I wanted to be careful about what quilt I selected. My parameters were that the blanket needed to be in-tact enough to be wearable, but not so pristine that it had more life left as a usable blanket.

I found a quilt on Marketplace pretty quickly and was excited to bring it home and get to work!

How I washed my quilt

Examining the quilt it was apparent that it was hand stitched (amazing!!) as well as a bit delicate in many spots. So hand washing in my bathtub was the best way to preserve the integrity of the blanket.

I filled the tub with cold water and a mild free-and-clear detergent then I gently placed the blanket in the water. I let it soak for about 10 minutes before using my hands to delicately swish it around in the water. Coming back every 10 minutes, I let the jacket ‘wash’ for about 30 mintutes total.

Wanting to avoid any sort of wringing, I gently squeezed out excess water after rinsing. I then laid out 3 towels and placed the blanket on them and rolled up the quilt in a long tube. This helped soak up most of the water (have you used this method? It’s the one I like to use when hand washing sweaters!). To finish the drying process, I placed the quilt out on my shaded porch and let the summer heat do the rest!

Pattern placement and cutting

The edging of this ‘Grandmother’s Garden’ quilt is so cute I knew I wanted to use it as the hem of the jacket and really make it a feature. This meant I had to be quite strategic with placing my pattern pieces. Thankfully the blanket was just big enough to allow it all to match up! Whew!

After a quick Instagram pole (thank you everyone!), I landed on the All Well Cardigan Coat by All Well Workshop. It’s a very simple, versatile, and hackable pattern, perfect for a project like this. I used the ‘long coat pre-quilted view’ and sewed up a size 2. It’s already a roomier style jacket, but I wanted to make sure I could layer under it all winter. (Search the hashtag for this pattern on Insta…there is endless inspiration!) I chose not to add any pockets at this point simply because I didn’t want to interrupt the adorable pattern of the hexagons.

Reinforcing

I tried to choose the most in-tact parts of the blanket for my garment, but inevitably there were some sections that needed reinforcing. After some thought I decided to use a very thin double sided stabilizer that has glue on both sides. I found this on Amazon (we were in quarantine at the time so I had to place an order!) and it worked very well. I would cut small bits and use long nose tweezers to place the stabilizer where it was needed, then iron it down with a press cloth between the iron and the quilt.

Another way I tried to reinforce the quilt was to shorten my stitch length on my machine and sew around every raw edge of the pattern pieces. Since this is a hand stitched quilt, I don’t want any undoing of all that precious work!

Binding

To bind the edges I went with several colors of bias binding. This was mainly b/c we were stuck at home and I didn’t have the option of purchasing all the same color. BUT, I actually LOVE this feature of the jacket. I think it makes it so fun and playful!

Continued Care

I like to think of this jacket as a living thing! It’s had many lives now and will need continued care as it ages even more! I will need to continue to reinforce bits of it as time goes on. I’ll have to always hand wash it (which is fine by me) and be mindful of it’s presence as I wear it. It’s definitely not a ‘set it and forget it’ type garment, but that’s what makes it so special to me!

Styling

I had fun dressing up my quilted jacket for these pictures, but I’m really looking forward to wearing it more casually after I give birth and can wear jeans again (oh jeans…how I miss you!). Layering for colder temps will be a fun challenge and I really think it will shine in the spotlight as spring approaches and I’m ready for fun happy colors but the weather is still a bit cold!

This make has really got my creative juices flowing! I had a blast making it! And I’m already brainstorming how to use the scraps that are left!

Would you wear a quilted coat? How would you style it? I’d love to hear!

September 20, 2021 /Star White
quilted jacket, cottage core, quilt coat, vintage quilt jacket
Clothing Makes
Comment

Lena Horne Dress Pattern Release by Tabitha Sewer

June 10, 2019 by Star White in Clothing Makes

Do you follow anyone online who has an inexplicable magnetism? Something about them is just special and you can’t help follow their every move. Tabitha Sewer is one of those people for me! She is a light in the sewing and maker community, bringing energy and color to every post. I love how Tabitha constantly shares what others are doing/making, keeping the focus not only on her own creative endeavors, but that of others as well!

Today I am OVER THE MOON excited to share the Lena Horne dress, designed by Tabitha and online at Joann’s. This is Tabitha’s first sewing pattern and there are so many fun elements (surprise surprise)! The most notable feature of the dress are the ruffle straps that crisscross in the back and come over the bust to end at the waistline. This on-trend detail makes a feminine statement and adds just the right amount of drama. :)
The Lena Horne dress also has inseam pockets and a side zip feature. Function and form…the best!

The Pattern: The Lena Horne Dress by Tabitha Sewer, soon available at Joann’s stores
The Fabric: Tropical Leaf Rayon Cotton Voile from Blackbird Fabrics
The Process: I began by pre-washing both my lining and main fabric. Tabitha has you line just the bodice of the dress, but due to the more sheer nature of the rayon cotton voile, I chose to line the skirt as well.
After cutting out the pattern, I simply followed Tabitha’s instructions and started piecing the dress together. The ruffle straps were the trickiest bit and you need to roll them into the inner-workings of the tube you create to pull them through. I’ve heard this called the ‘burrito method’. Tabitha has a video tutorial which is immensely helpful if you get stuck at any point in the process.
There isn’t mention of finishing most seams, that is something I would change for the next time I make the dress…finishing all seams before construction.
Modifications: I sewed a straight size 4. The only modification I made outside of lining the skirt was to extend the zipper all the way down to the top of the pocket (into the skirt about 2 inches). I thought this would allow me to get in/out of the dress more easily.
Styling & Versatility: This dress is a stand-alone dress that speaks for itself! I chose to style it for a beachy summer look with bright heels and a straw purse. I think it could be super cute styled with sneakers as well!
Overall Review: DARLING dress design by a DARLING lady, Tabitha! Definitely an intermediate pattern, but with the help of the video tutorial, this dress becomes immensely doable!

I’m incredibly grateful to Tabitha for reaching out and sending me her first pattern! She was a joy to communicate with and I can’t wait to see where her journey goes!
As always, thank you to my incredible photographer and friend, Jill Burrow, for taking these photos and being ever-patient with this gangly non-model trying her very best. :)

June 10, 2019 /Star White
summer style, Tabitha Sewer, well fibre, blackbird fabric, Joann's, sewing blog, sewing blogger, Lena Horne Dress, summer 2019, summer fashion
Clothing Makes
Comment

Classic Button Up with a Twist

April 22, 2019 by Star White in Clothing Makes

Hello friends! After a Lenten sabbatical, I am back to sewing…and just in time for this lovely spring we’ve been having.

One of my very favorite wardrobe staples are my white button-up tops. Tie them up, tuck them in, wear them with jeans, wear them with a pencil skirt…gah…they are just so timeless and versatile. So when I saw the cover of the McCall’s M7838, my heart did a little leap. A classic button-up with a statement sleeve…I’m in!
I found this incredible grid fabric at Joann’s and *gasp* paid full price for it (something I never do!). But sometimes a fabric calls out to you in a way that demands your full attention and pocket-book. ;) I knew this fabric and pattern were a match made in sewing heaven.

The Pattern: McCall’s M7838
The Fabric: Rayon-poly blend by Joann’s (They’re ‘Spring Garden’ collection)
The Process: This was my first time EVER making a collared top and doing a full button placket. It was a bit of a risk since I had invested in the fabric, but I’m so glad I went for it! I was also hesitant b/c the fabric has a subtle wavy pattern in the grid lines and I wasn’t sure how it would work with interfacing, but the fabric was dreamy to work with and washes well to boot!
Normally I crank out my projects pretty quickly, but with this top I really took my time. I focused heavily on making sure the ruffles were spaced evenly, the grid was perfectly vertical, and I even re-attached the collar 3 times to get the spacing right and loose some annoying puckers. A LOT was learned along the way. :)
The top has 17 button holes and buttons. That’s right, SEVENTEEN! So I utilized my new Singer Quantum Stylists to it’s fullest potential and enjoyed the button hole and button sewing feet. It went well and the finish looks so professional!
Modifications: I sewed a straight size 8 after making a quick muslin to ensure the shoulders weren’t too tight (after my duster had been a bit snug, I wasn’t taking any chances!). I followed the pattern instructions as closely as possible, but in hind site, my first full collar and button placket should have been with an indie-pattern. The instructions for this top are SPARSE, so I relied heavily on intuition which worked out OK, but some further hand-holding would have been appreciated. Indie designers tend to provide ample guidance and pictures for the more tricky bits…something I greatly appreciate!
Styling & Versatility: Y’ALL. I love me a good white button up. I can’t wait to try layering this under something like the York Pinafore. Wouldn’t that be cute!? I think I may tuck it into a midi-skirt this spring as well as throw it on with my torn up Levi’s . White button ups are so timeless, I believe this will linger in my wardrobe for years to come!
Overall Review: Love the top! Don’t adore the sparse instructions. But, if you have experience with collars and packets…you will be fine!

Thank you to my lovely photographer, Jill, for these photos!

April 22, 2019 /Star White
mccalls, well fibre, white button up, sewing blog, sewing blogger, joann's fabric, spring fashion, spring 2019, spring 2019 style, diy, statement sleeve
Clothing Makes
2 Comments
  • Newer
  • Older