Well Fibre

  • Home
  • Workbook
  • Services
  • Shop
  • Blog
  • About
  • Contact

Introducing My Wardrobe Workbook!

October 16, 2023 by Star White

Do you find yourself struggling to put together stylish outfits that truly reflect your personality? If so, I have exciting news for you! I am thrilled to introduce my latest creation, the Wardrobe Workbook – a comprehensive guide designed to help you unlock your style potential and build a wardrobe that makes you feel confident and fabulous every day.

1. What is the Wardrobe Workbook?
The Wardrobe Workbook is a carefully crafted resource that combines my years of experience as a fashion stylist with practical tools and exercises to transform your wardrobe. It is a step-by-step guide that will take you on a journey of self-discovery, helping you define your personal style, declutter your closet, and curate a collection of staple clothing that function beautifully in your day-to-day life.

2. Discover Your Personal Style:
One of the key aspects of the Wardrobe Workbook is helping you discover and define your personal style. Through a series of thought-provoking questions and exercises, you will gain clarity on your fashion preferences, lifestyle needs, and the image you want to project. By understanding your unique style, you will be able to make more intentional and confident choices when it comes to your wardrobe.

3. Declutter and Organize:
A cluttered and disorganized closet can be overwhelming and hinder your ability to create stylish outfits. The Wardrobe Workbook provides practical tips and strategies to declutter your wardrobe, helping you let go of items that no longer serve you and make room for pieces that truly align with your style. We will talk about creative and sustainable ways to part with your old clothing.

4. Build a Versatile Wardrobe:
Building a versatile wardrobe is all about having a collection of key pieces that can be mixed and matched to create countless stylish outfits. In the Wardrobe Workbook, I guide you through the process of identifying your wardrobe essentials, focusing on matching the reality of your life with a effective wardrobe. You will walk away with core wardrobe pieces as priority, so you can then add the flair that makes your style unique.

5. Shopping List & Budget:
To further enhance your style journey, the Wardrobe Workbook includes a shopping checklist as well as a page dedicated to help you plan thoughtfully about future purchases. We consider things like sourcing and budget as we build this plan.


If you're ready to transform your wardrobe and embrace a style that truly reflects who you are, the Wardrobe Workbook is your ultimate companion. With its comprehensive approach, practical exercises, and expert guidance, you will gain the confidence and knowledge to curate a wardrobe that makes you look and feel amazing every day. Get ready to unlock your style potential and embark on a fashion journey that will revolutionize the way you dress. Are you ready to take the first step?

Wardrobe Workbook
October 16, 2023 /Star White
Comment

The Ultimate Guide to Hosting a Clothing Swap!

October 15, 2023 by Star White

In a world where it’s all too easy to donate unwanted items, many of us are seeking more thoughtful sustainable ways to re-home our unwanted garments or shop ‘new-to-us’. One way to do this is by hosting a clothing swap!

Hosting a clothing swap is a fun and sustainable way to refresh your wardrobe without spending a dime. Not only will you get to revamp your style, but you'll also promote sustainable fashion practices by giving new life to pre-loved garments. In this guide, I will walk you through the steps to host a successful clothing swap that will leave everyone feeling stylish and satisfied.

1. Plan and Prepare:
- Set a Date and Venue: Choose a date that works for most of your friends and find a spacious venue to accommodate everyone comfortably.
- Guest List: Create a guest list and invite friends who have similar tastes and sizes to ensure a successful swap. If your friends are varying sizes, that’s ok! Encourage everyone to bring items like outerwear (hats, gloves, scarves) and accessories (purses, jewelry, etc). No one should feel left out.
- Theme or Focus: Consider having a theme for your clothing swap, such as "Spring/Summer Styles" or "Workwear Essentials," to make it more exciting and focused.

2. Organize and Sort:
- Set Guidelines: Establish guidelines for the clothing swap, such as the condition of items (clean and in good condition), the number of items each person can bring, and any specific categories (e.g., tops, bottoms, accessories).
- Sorting Stations: Set up different stations for each clothing category to make it easier for guests to browse and select items.
- Display and Arrange: Hang or fold the clothes neatly, making them easily accessible and visible to everyone.

3. Swap Guidelines:
- Fairness: Encourage fairness by implementing a "one-for-one" rule, where guests can only take as many items as they bring.
- Swapping Order: Decide on the swapping order, such as drawing numbers or using a rotation system, to ensure everyone gets a fair chance to choose items.
- Time Limit: Set a time limit for each round of swapping to keep the event organized and prevent overcrowding at popular stations.
- Don’t care for rules? Want to make things more low-key? Cool. Grab a bottle of wine to share and let everyone go for it! :)

4. Add Extra Fun:
- Styling Corner: Create a styling corner with mirrors, accessories, and fashion magazines to inspire guests to try on different outfits and experiment with new looks.
- Refreshments: Provide light refreshments and drinks to keep everyone energized and in a festive mood.
- Donation Option: Encourage guests to bring any unclaimed items to donate to a local charity or clothing drive, promoting sustainability and giving back to the community.

5. Post-Swap Followup:
- Donation Drop-Off: Arrange for a donation drop-off point or schedule a pickup with a local charity to ensure the unclaimed items find a new home.
- Encourage your friends to share pictures when they wear the items they got from the swap!
- Schedule the next swap! Was your event successful?! Schedule another one for a different season or ‘theme’.


Hosting a clothing swap is not only a great way to update your wardrobe but also an opportunity to connect with friends, promote sustainable fashion, and have a fun-filled event. By following these steps, you'll be well on your way to hosting a successful clothing swap that will leave everyone reinvigorated about their closets. So, gather your friends, start sorting those clothes, and get ready for a fabulous fashion exchange!

October 15, 2023 /Star White
Comment

Easy DIY Elastic Skirt (styled 4 ways!)

October 05, 2021 by Star White in Clothing Makes

What’s more satisfying than a quick DIY resulting in something wearable and cute?! Not much if you ask me…

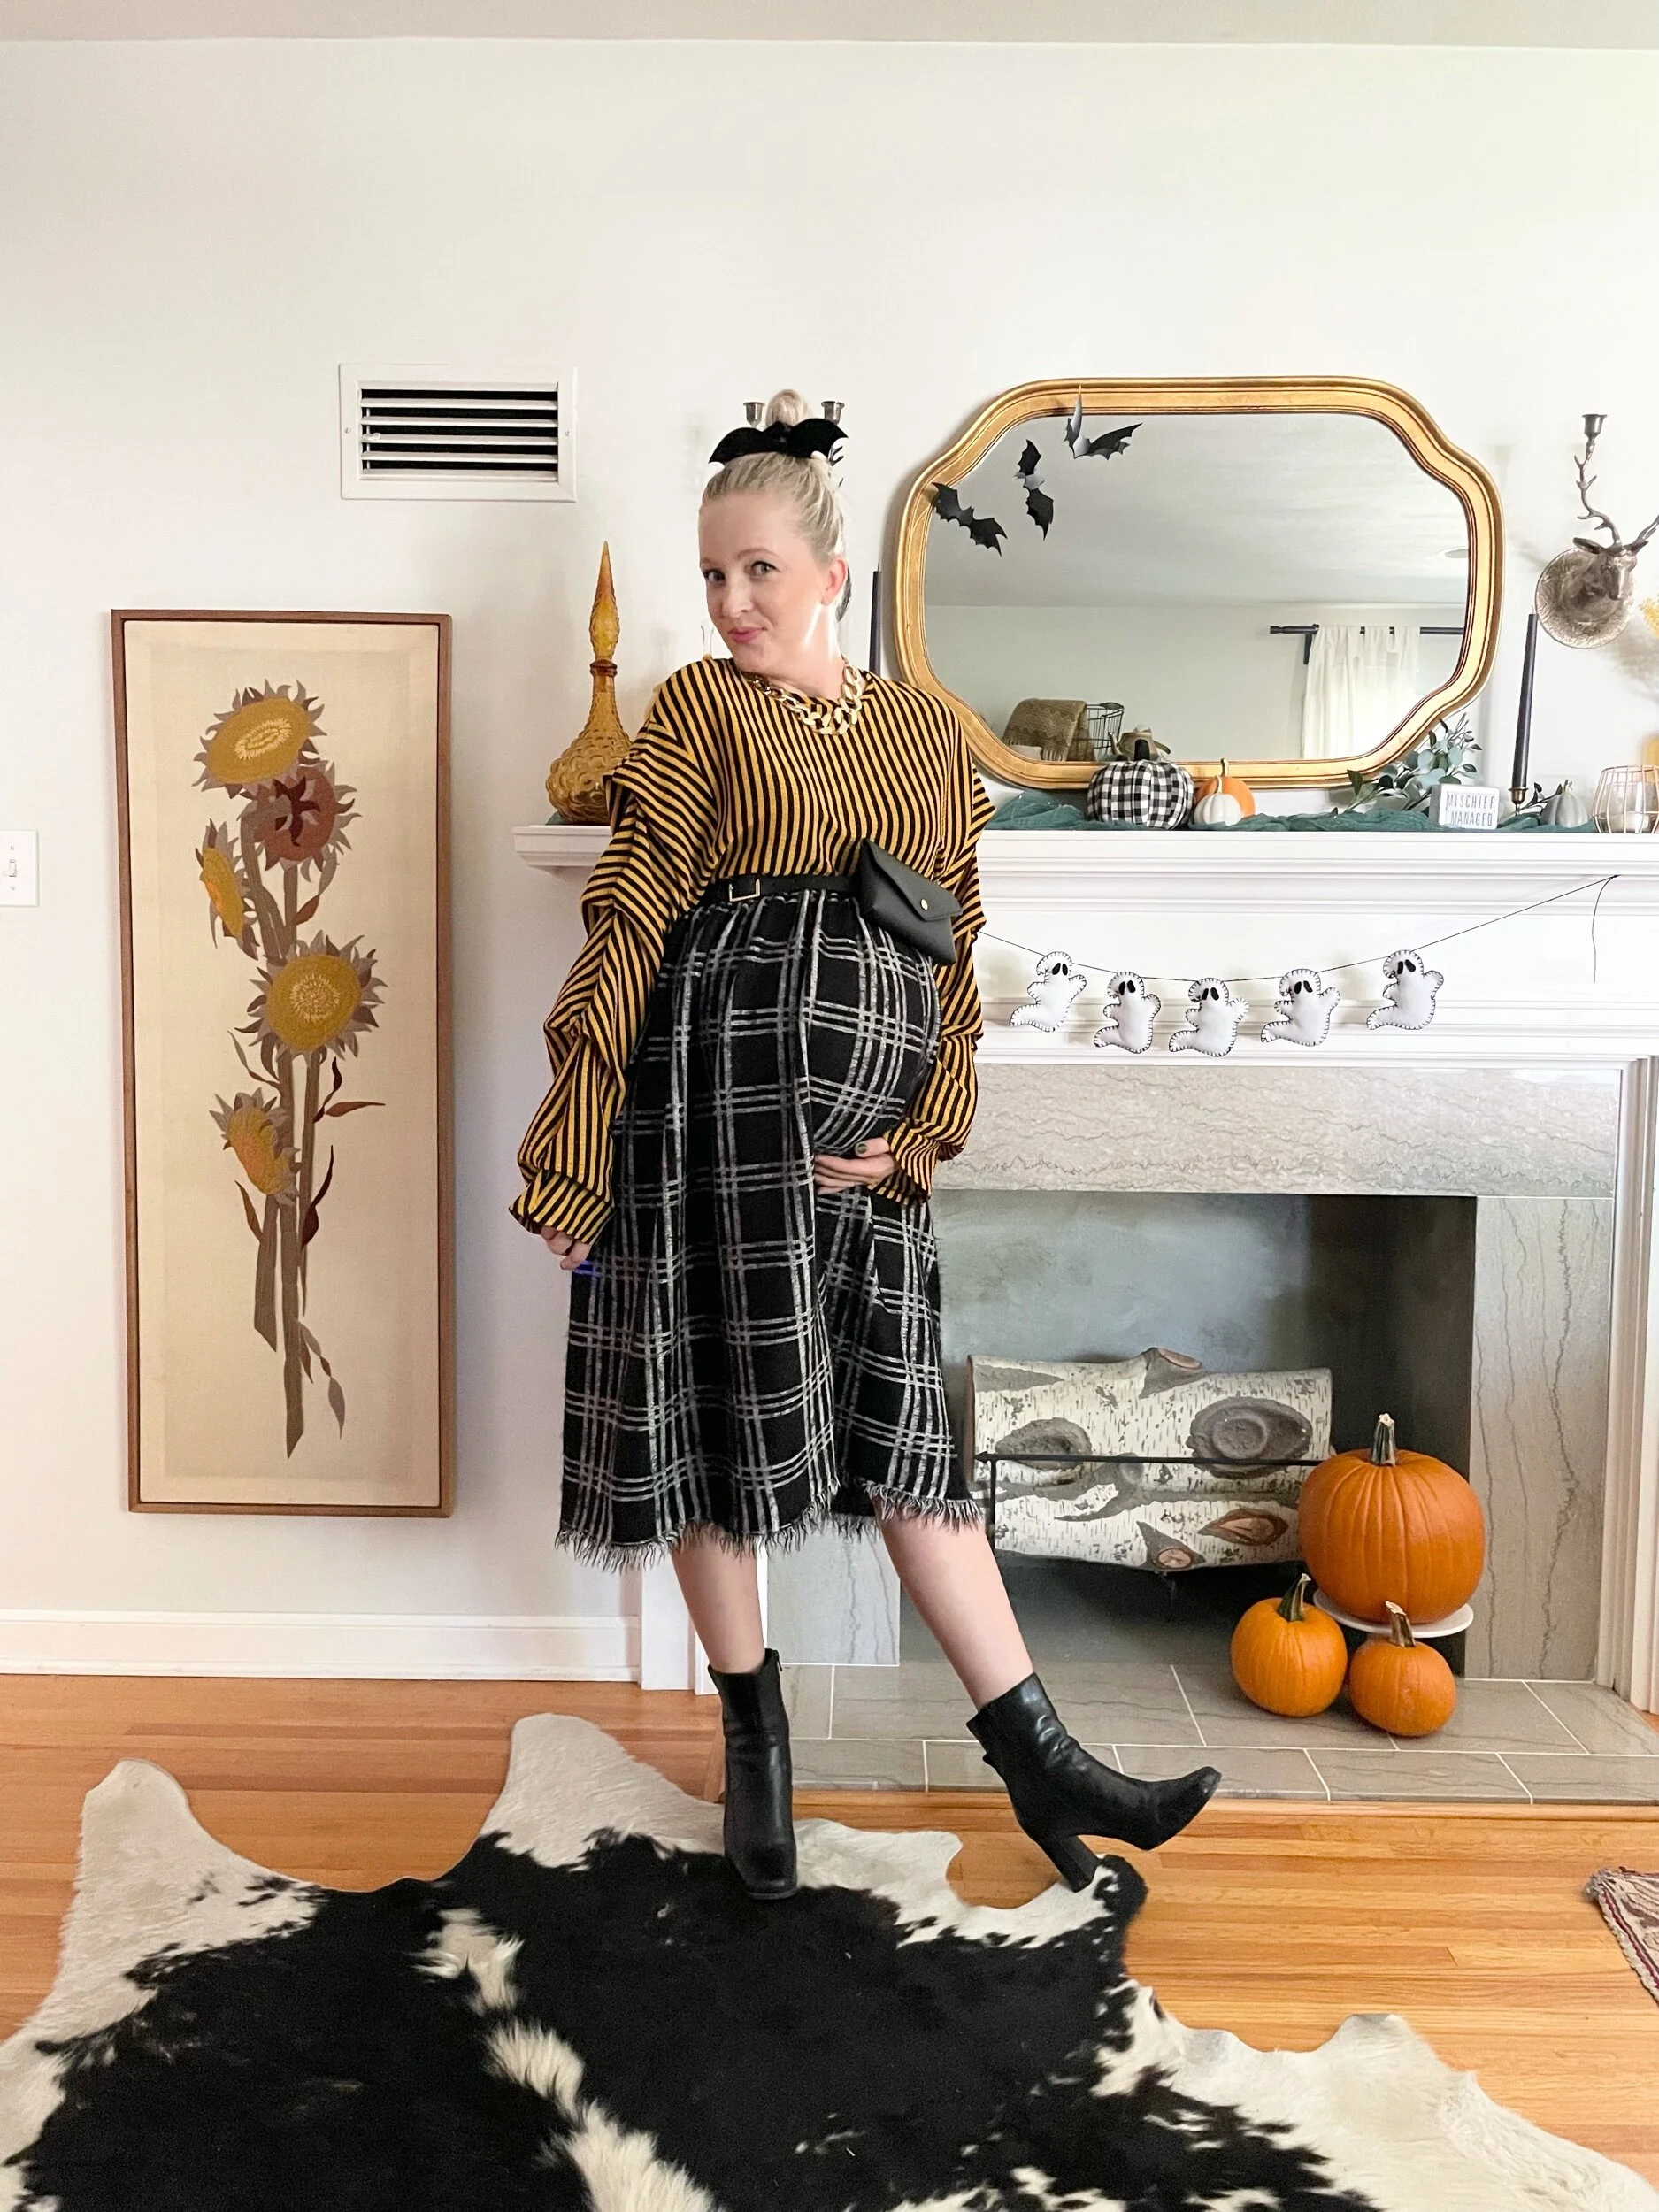
When I stumbled upon this fabric on sale at Joann’s the other day, I knew it needed to become a gathered skirt to adorn this big bump of mine as well as my post-partum body this fall. I’m very into garments that can accommodate body fluctuation, which there has been much of for me this year. 🙃

To create a similar skirt you will need:

  • Wide elastic

  • Fabric with a good drape

  • Thread

  • A sewing machine

Here is how I put this skirt together!

  1. Take your elastic and wrap it around your waist. Tighten it a little more than what is comfortable as it will ‘grow’ a bit when adding the fabric later. Then cut with about an inch added in length for seam allowance.

  2. Sew the elastic together using a French seam style (see this illustration for example).

  3. Hold up your fabric in the mirror and decide on the length of your skirt. I wanted a midi-style so I cut accordingly. I wanted to showcase this fabric’s raw funky edge so I didn’t have to accommodate for a hem, but do consider that if your skirt will need to be hemmed.

  4. Measure the circumference of your elastic to determine the width to cut your fabric. This doesn’t have to be precise, but I ended up with about a 1:1.75 ratio. Meaning the width of the fabric is 1.75 times the total circumference of the elastic. This is how you achieve a gathered look!

  5. Using a straight stitch, sew your skirt’s back seam by bringing wrong sides together. Finish raw edges of this seam and the top raw edge in your desired manner (I used my serger).

  6. Now for the gathering! On your machine’s longest stitch setting, sew 2 rows of stitches at the top of your skirt at 3/8in & 5/8in (elastic is set aside for now). I like to use a contrasting thread as it helps to see clearly what you’re doing and it will be discarded later. Make sure not to backstitch bc you need to pull the threads.

  7. Grab your elastic and place pins at the 1/2, 1/4, and 1/8 marks. I do this by simply folding it in half, putting a pin in, folding that part in half, and repeating.
    Do this same step for the top of your skirt.
    You should have the same number of pins in your elastic and your skirt top.

  8. With right sided together, match pins from skirt and elastic. All of this work helps to distribute your gathers nice and evenly!
    Gently pull on the 2 bobbin threads on the skirt to start to gather fabric. Take your time here to maneuver the fabric and place extra pins to hold it in place.
    When gathers are set, I like to knot the bobbin thread to hold it all in place.

  9. Now, with your machine set to a zigzag stitch, sew the gathered fabric to the elastic using desired thread color. The zigzag stitch allows the elastic to be able to stretch once you’re all done.
    This is the part where the waist ‘grows’ a little and why you want it go a little tighter on the elastic as mentioned before.

  10. Hem the bottom of your skirt if needed and enjoy!!

I had a lot of fun styling this skirt for the fall, especially the month of October! I mean, what else does one do at 38 weeks pregnant while they await their baby’s arrival? 😂

Go to my Instagram and tell me which look is your fav!! Happy sewing, friends!

October 05, 2021 /Star White
diy skirt, diy elastic skirt, simple sewing, beginner sewing, wellfibre, fall style, maternity style, fall maternity style
Clothing Makes
Comment

DIY Ghost Pillow (w free pattern!)

September 29, 2021 by Star White in At Home

Boo! 👻

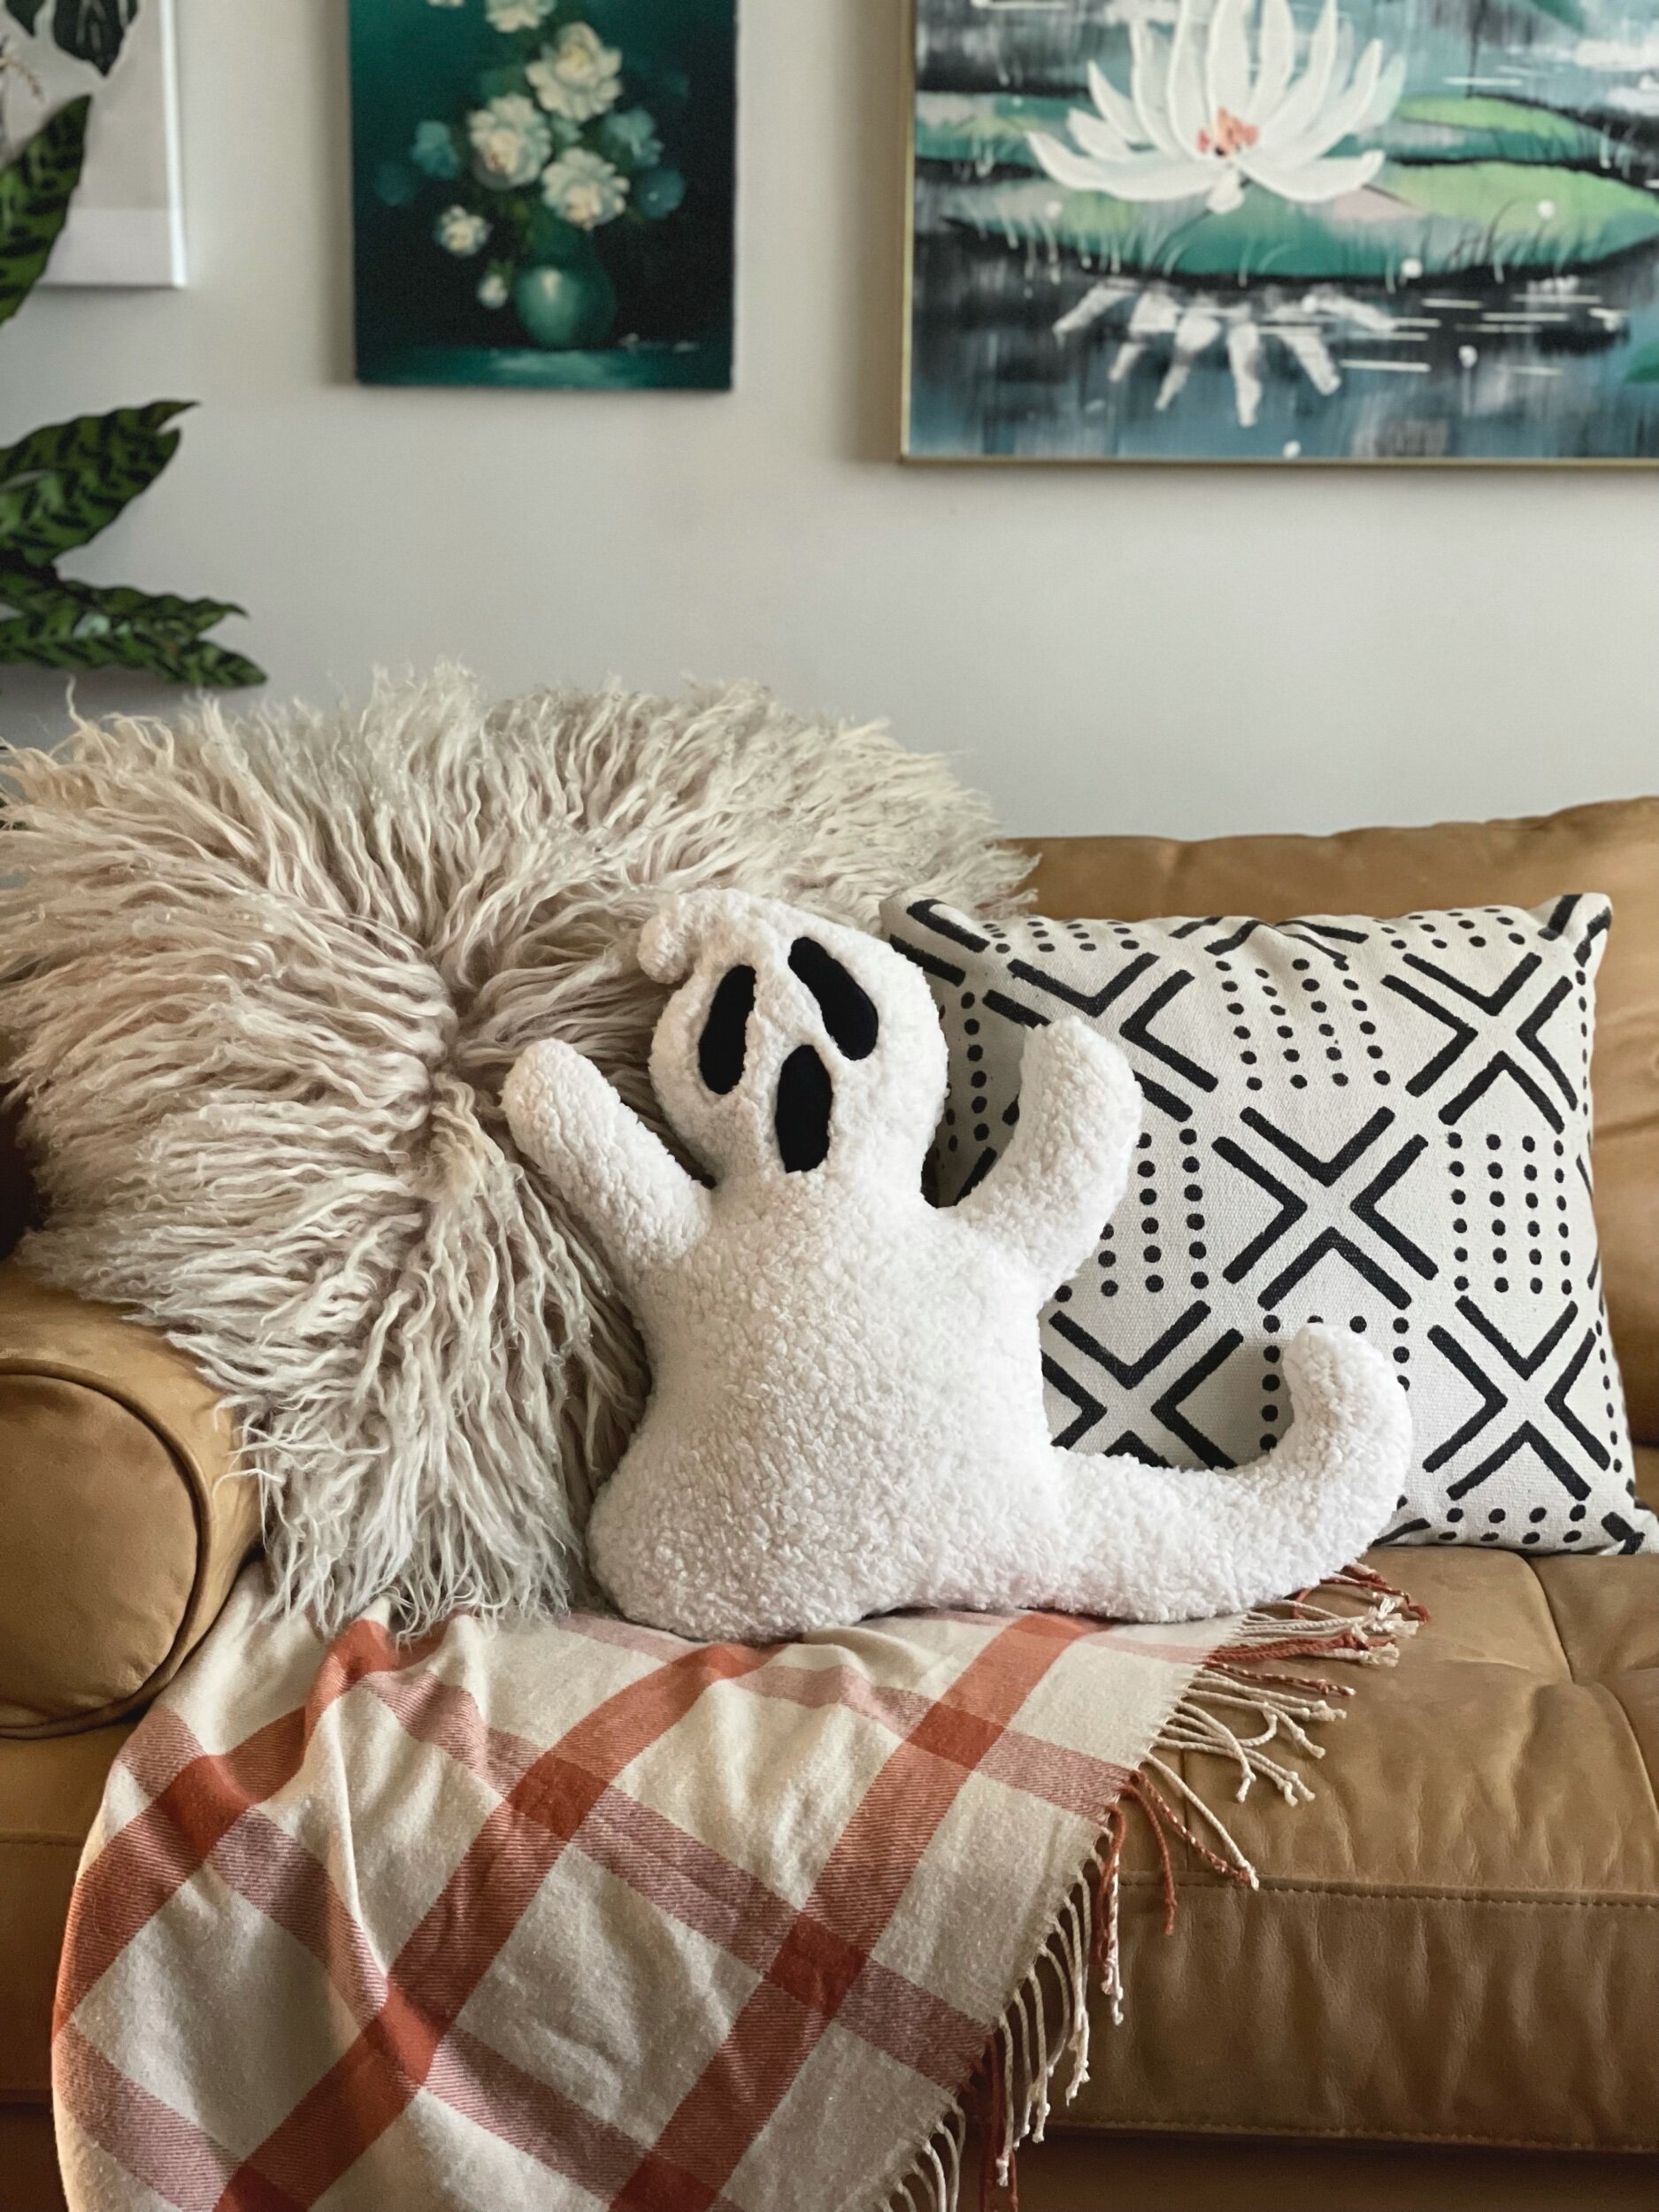
Spooky season is upon us and I’m really into all the cute Halloween decorations this year. I typically only decorate for Fall, but I’ve got the itch to add more black and white Halloween vibes to my home! Perhaps I’m nesting? Or perhaps it’s another excuse to go all out decorating? Who knows!

After searching on the internet and looking locally for a cute pillow to add to my couch, I decided I wanted to make one instead! I just couldn’t find one I was happy with.

I grabbed some of my kids butcher paper and began drawing the general shape I wanted and tweaked it until I was happy with the curves and the look of my little ghost. Then I got to work!

Here are the supplies needed to recreate this pillow:

  • ghost pillow pattern

  • faux Sherpa fabric in ivory or white (I used ivory)

  • black fuzzy fabric (for eyes)

  • black and white thread

  • sewing machine (or a needle and some patience)

  • Poly-fil for stuffing

  • Optional: stabilizer & spray adhesive

Instructions for construction:

  1. Lay out Sherpa fabric right side down. Using your assembled pattern trace around the paper .5 inches away (the pattern does NOT include a seam allowance). Cut out fabric. Repeat this step but be sure to flip the ghost pattern to the other side before tracing.

  2. Using eye and mouth template, trace and cut out fabric. No seam allowance is needed for this part as you will be ‘appliquéing’ the eyes and mouth onto the ghost body.

  3. (Optional but very helpful step) Using iron-on stabilizer, stabilize the back of the eyes and mouth. This will help keep them from shedding and slipping as you sew them.

  4. Decide on the placement of your ghost’s eyes and mouth and pin them in place. (I chose to use spray adhesive before pinning at this point to really keep them where I wanted, but it’s not 100% necessary). With your sewing machine set to a close zig-zag stitch (I played around on a scrap piece of fabric to get it just right), carefully sew around each piece. This took a bit of time and patience as you must lift the presser foot to maneuver around the curves.
    Alternatively, you could hand stitch these on if you are feeling ambitions or the zig-zag option is giving you trouble.

  5. Place your ghost right sides together, pin in place. Following your outline, sew the ghost together on a normal stitch leaving an opening at the bottom to fill. I clipped into the curve at the top of his head so his cute tuft would end up the shape I wanted.

  6. Turn ghost right-side-out and fill using Poly-fil. Be sure to really stuff the tuft at the top of the head, as well as the arms and tail.

  7. Hand sew the opening closed and enjoy your adorable new ghost pillow!!

Pictured here is what the back of the ghost looks like after appliquéing on the eyes and mouth.

Pictured here is what the back of the ghost looks like after appliquéing on the eyes and mouth.

September 29, 2021 /Star White
halloween diy, ghost pillow diy, ghost pillow, spooky diy, halloween decor, diy halloween
At Home
1 Comment

Nursing Friendly Envelope Dress

September 22, 2021 by Star White in Clothing Makes

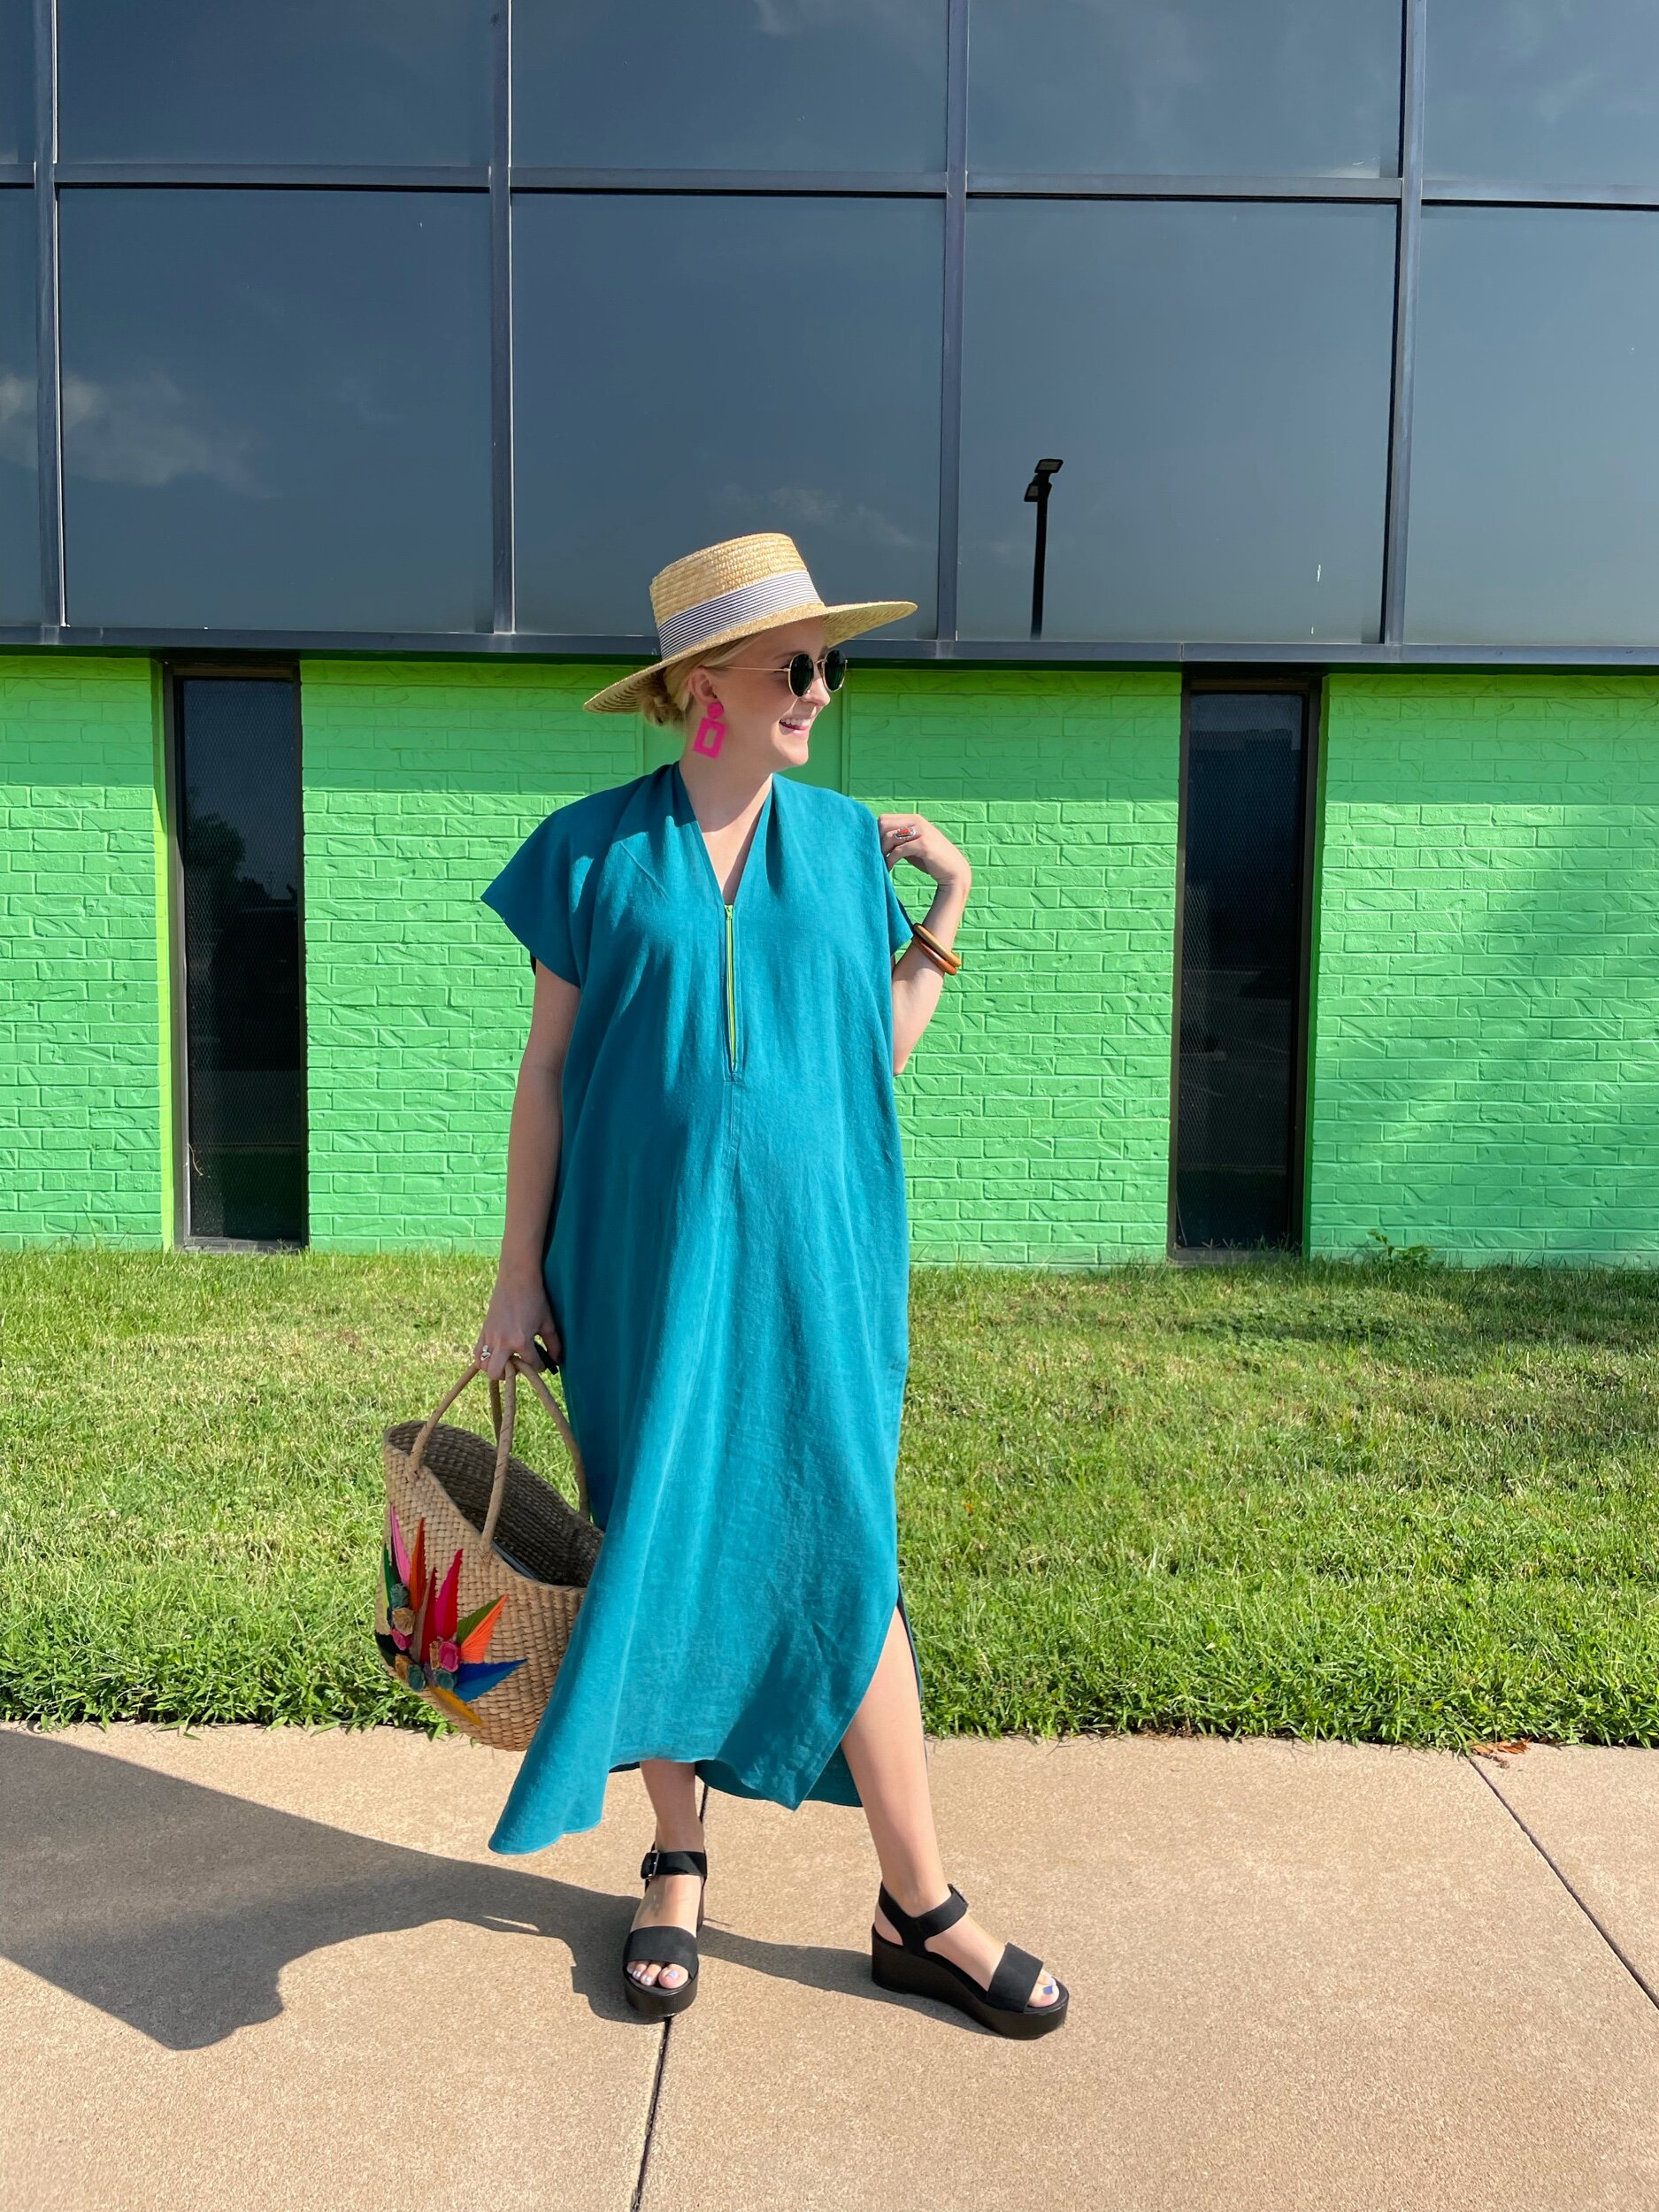
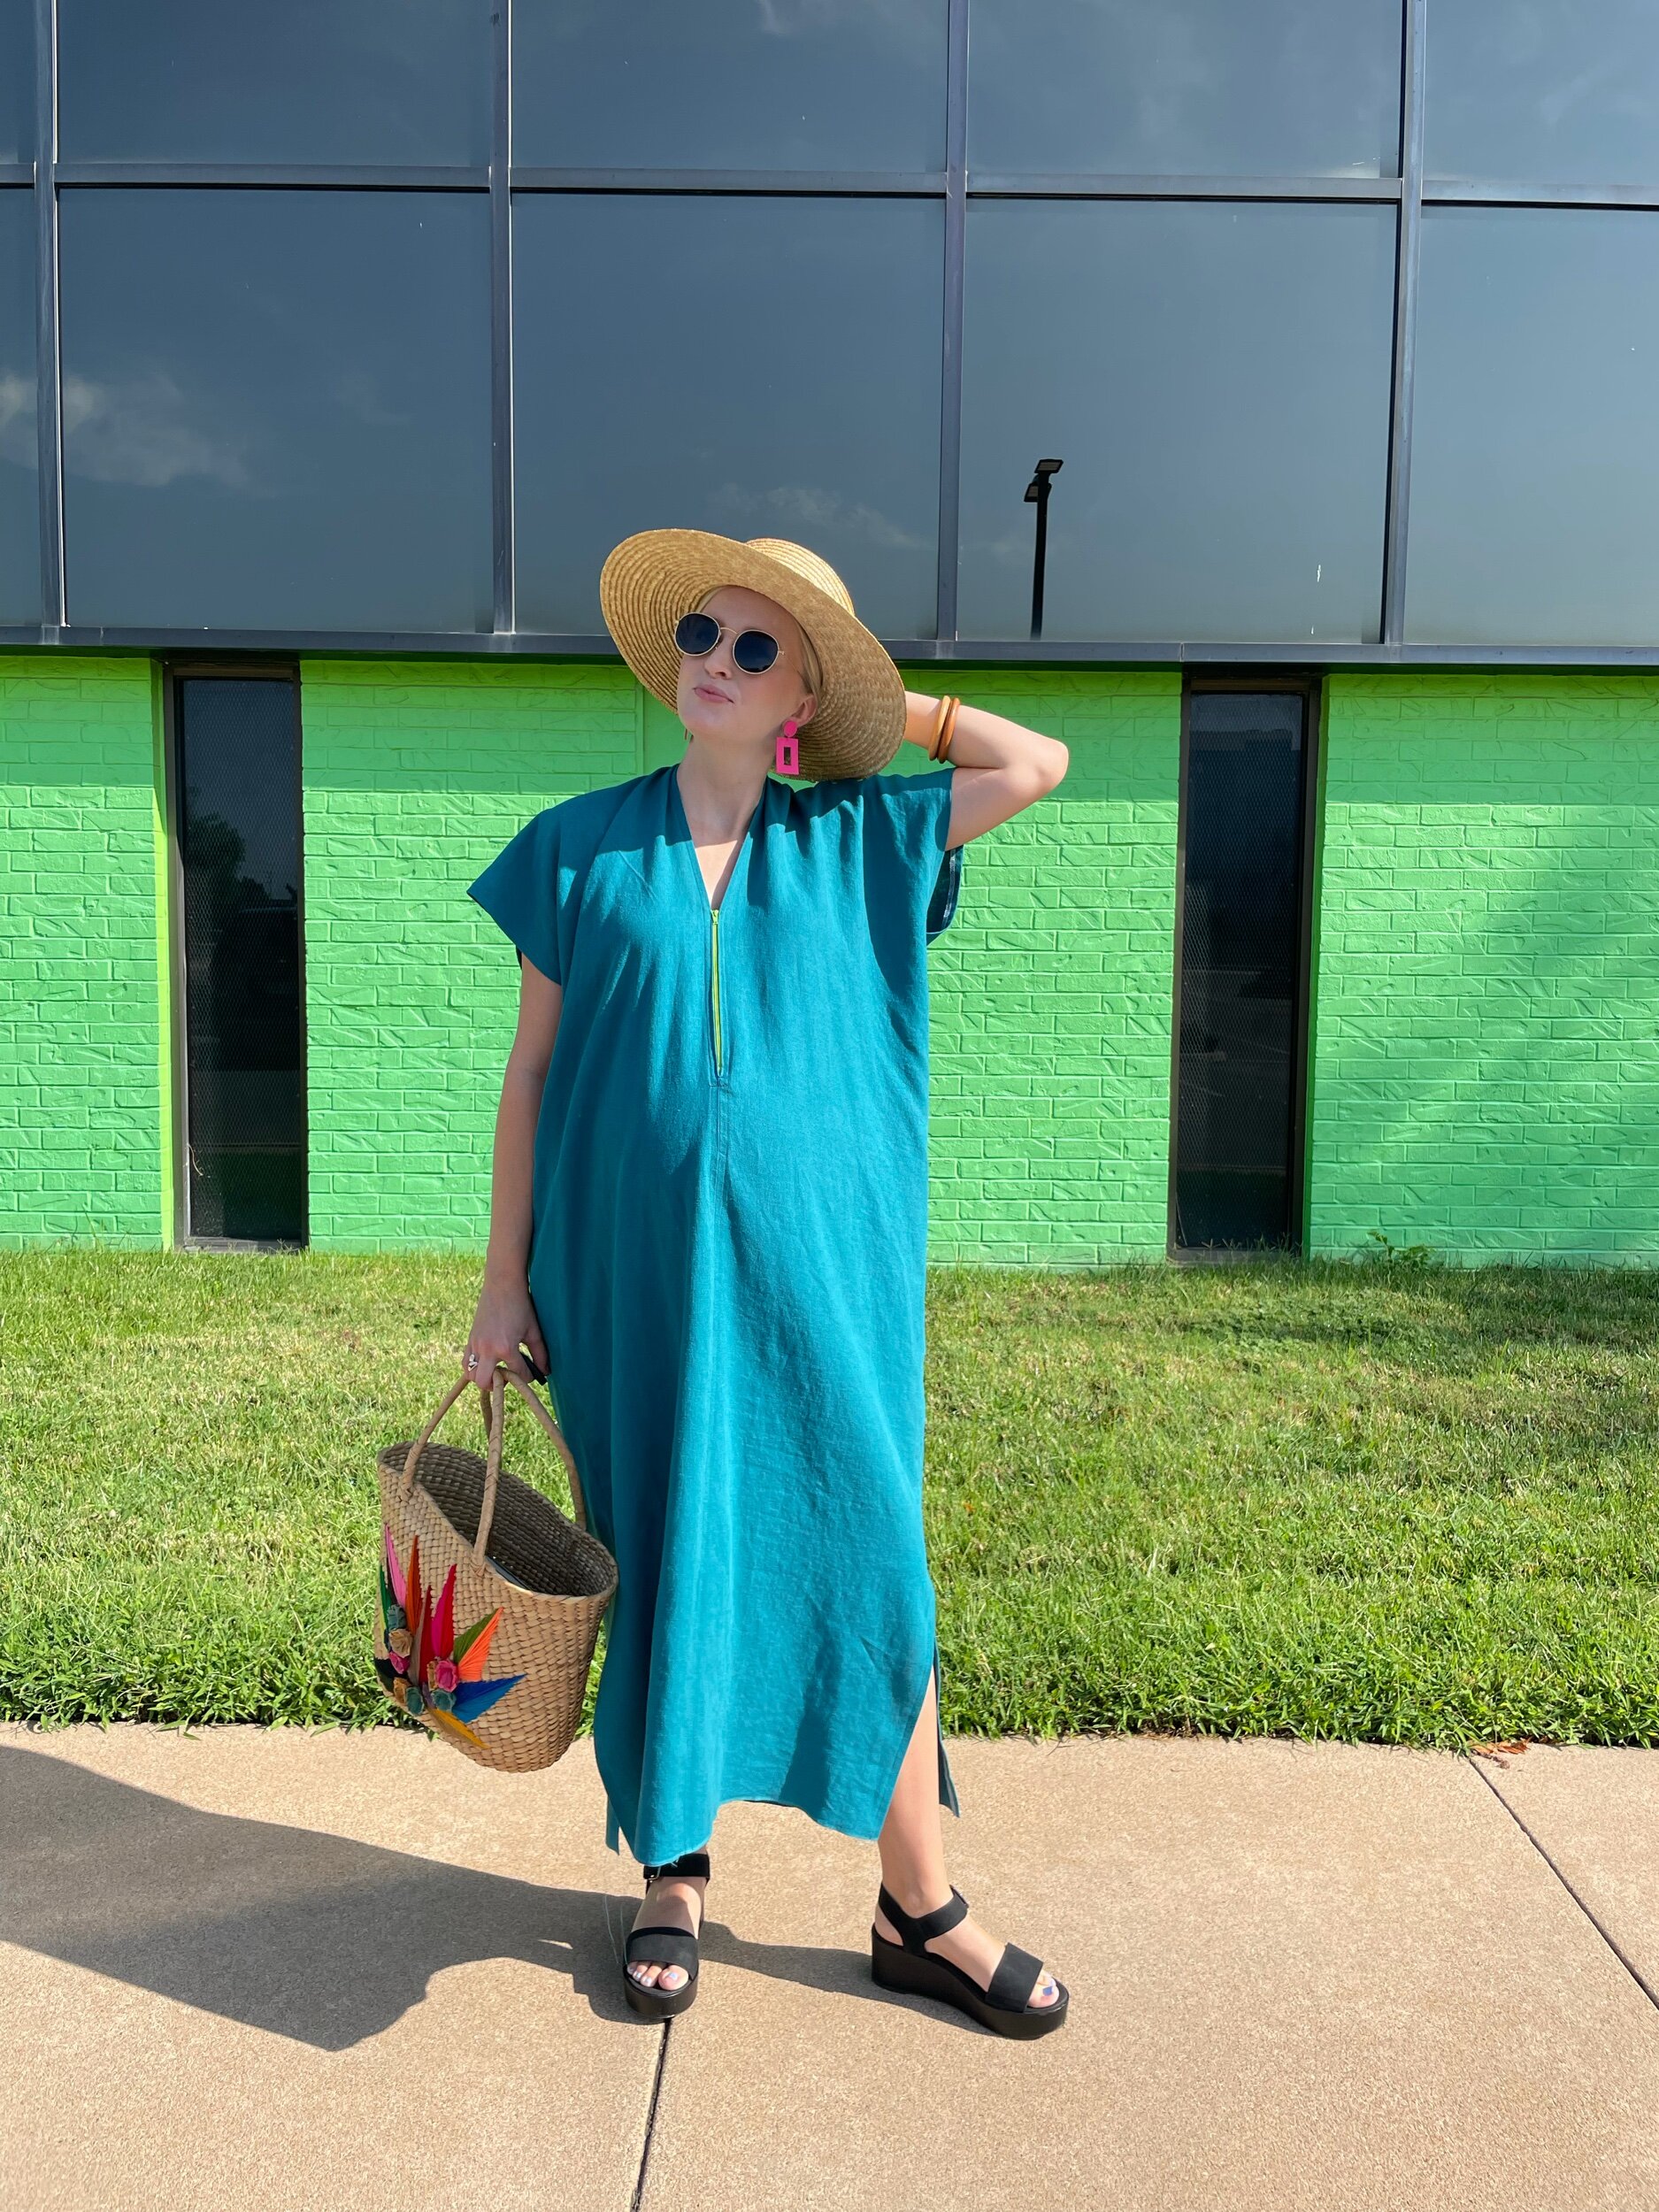
Hi from me and my 36 week bump!

As I approach the delivery of my son (Hugo!), I’m eager to find garments that are both nursing friendly AND my style. This is turning up to be hard to find! So…to Instagram hashtags and my sewing machine I go!

The Cris Woods Envelope Dress has been in the queue for some time, but it wasn’t until I saw Tori from The Sewing Things Blog create a nursing friendly version that I decided to pull the trigger!

IMG_2338.jpeg

Tori inserted an invisible zipper into the neckline front seam, a super simple and incredibly functional hack. Absolutely brilliant!

I shamelessly used her hack and dug through my zipper stash. I didn’t have an invisible zipper that fit the bill, but I did have this apple-green vintage one that I was instantly drawn to. I love the contrast of the teal rayon linen (found at Joann’s on sale last year) and the green.

I simply followed the pattern instructions as well as the zipper instructions found on the packaging to place the zipper in the front seam at the top.

The only other modification I made was adding vents to the bottom side seams to make walking a little less restricted. I didn’t even have to hem the dress bc the selvedge edge was just too cute to hide!

And that’s it! This is a GREAT beginner friendly pattern that accommodates body size change (can I get an amen?!) as well as changing seasons. I’m excited to style it for fall!

I may make a belt to accompany the dress once my body settles into its new norm in a few months. We will see how sleep deprived I am! 🙃

Thank you to Cris and Tori for inspiring me!!

September 22, 2021 /Star White
envelopedress, criswoodsenvelopedress, beginnersewing, nursingfriendly, nursingfriendlydress, linenrayon, simplediydress, zipfrontdress, criswoods
Clothing Makes
2 Comments
  • Newer
  • Older