
Marcella Romano Blog Tour - Simplicity 8086
Are you ready to see the fanciest and hardest thing I've ever made?....Here it is!


Today, Leslie of Thread Bear Garments, and I are the next stop on a blog tour of talented ladies. We all selected fabric from a very sweet family-owned Italian fabric shop called Marcella Romano. The rules for the tour were...'there are no rules'. In other words, we could make whatever our hearts desired. How fun!

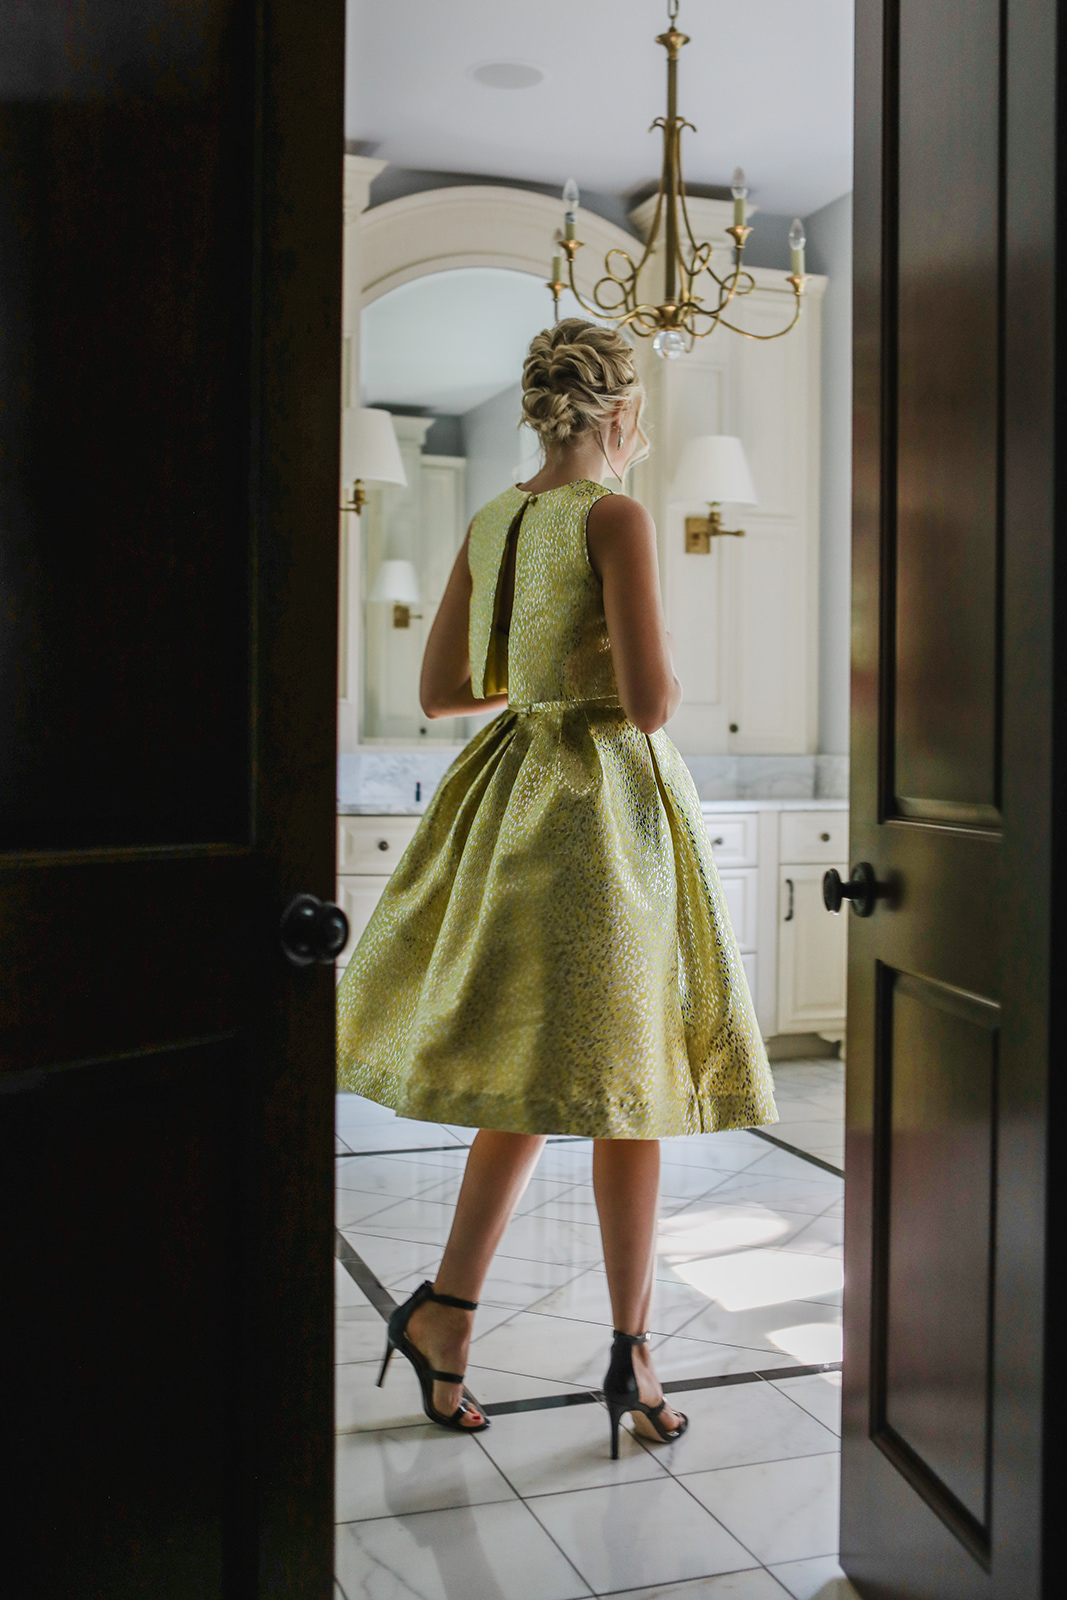
For the last year I've wanted to make Simplicity 8086 by Cynthia Rowley. My vision was to make the dress in a fancy fabric and wear it to my husband's work Christmas party. When I saw this particular jacquard on Marcella's site, I knew it was meant to be!

The Pattern: Simplicity 8086 by Cynthia Rowley
The Fabric: Main fabric - metallic jacquard with yellow drops c/o Marcella Romano. Lining fabric - satin faced twill purchased from Mood Fabrics.
The Process: I approached this project with great care, b/c y'all...this fabric is incredible. I've never worked with anything like it and I wanted to do it justice. My first order of business was reading any and all blogs/instagram posts/pattern reviews I could find. Lots of people struggled with this pattern, particularly at step 19, the part where the outer top piece attaches to the inside piece. That's right, this dress is all one piece, even though it looks like separates. Thank heaven for Melanie of Prima Dress Maker, who blogged about her process of sewing this dress AND included pictures and personal instructions to make it through the trickiest part. She was my God-sent angel (and I messaged her and told her so). If you ever create this dress, reference her post and you will make it through.
Next, I took my measurements and started on my muslin. Due to the more advanced level of this dress, the muslin was very helpful. I was able to troubleshoot fit issues and rip out seams without minding the fabric too much. I could tell the jacquard would need to be handled as little as possible so I wanted to go into the final version knowing exactly what I was doing.
After I was happy with the muslin I began cutting the lining and main fabrics. Per my mother-in-laws excellent advice, I serged along the edges of every jacquard piece. The fabric frays easily and I wanted to prevent any unraveling of this precious fabric (this step was KEY).
From there I followed the instructions, utilized what I learned from Melanie's post as well as my muslin trial then put the dress together.
Modifications: For sizing I sewed an 8 on top and a size 12 on the bottom, blending the two where the skirt and bodice attach. To do this I added 5/8 inch extra to the center back part of the bodice pieces.
Due to the nature of the jacquard, I decided to line the skirt, which the pattern does not call for. I drafted an a-line skirt following a tutorial I found online. In the end it didn't have enough ease, so my mother-in-law helped me add a wedge to the center front. This is all hidden away underneath the dress so it's not seen.
What I Learned the Hard Way: I'm adding this section for the sake of this particular post. Let me share the things I would do differently if I created this again or utilized this type of fabric again.
- Do not 'reduce bulk' at seam allowance by simply trimming with scissors. This fabric MUST be reinforced with serging. Either ignore instruction to trim allowance or serge it closer to the seam.
- Reduce stitch length due to more loosely woven nature of fabric. I wish I would have done this particularly where the skirt attaches to the bodice. The weight of the fabric and lining causes a bit of stress.
- Apply a strip of interfacing to jacquard where bodice and skirt meet as well as center back where zipper is inserted. This would ensure longevity of dress in high-stress areas.
- Do not snip to reduce bulk when inserting invisible zipper. Sadly, I did this and the fabric started to fray on the outside after taking the dress off and on several times. I reinforced the weakend area after the fact, but now it's not as secure.
- For the lining of the skirt, finish raw edges of seem before attaching. This seams obvious, and it is. But I forgot and now there are raw edges exposed if you look underneath (which nobody will be doing but me. Haha).
Styling & Versatility: This dress is a show-stopper. That wasn't my intention exactly, but I'm incredibly proud of it. I will be wearing this to my husband's work party at Christmas and sitting/dancing very delicately. :) When I put on the dress I felt like the queen of England...which is fun, but not really my style. So, I'm pairing it with a strappy sexy heel and playful jewelry for the party. No pearls.
Overal Review: This pattern and fabric stretched my abilities and challenged me in very good ways. Just like following the completion of my Hampton Jean Jacket, I feel I've earned another star in my sewing journey. Skills that will come with me moving forward. This was HARD, but I did it and I'm hella proud.


I want to give a shoutout to a few INCREDIBLE ladies who were instrumental in making this all happen:
- Jill Nicole of Jill Nicole Photos for her stunning work. Aren't the pictures breathtaking? She was so patient with me as I attempted to model (not my strength).
- Lauren Davis of @thisislaurendavis for putting my hair up in this amazing updo! Check out her instagram page...she is hair and nail goals.
- Marie Fleurine of Sew Marie Fleur who coordinated this blog tour in collaboration with Marcella Romano. Thanks, girl!
- Kathy White, my mother-in-law who is always there to help me and has years of sewing wisdom.


Don't miss the other ladies on this tour! See them here: